
Zapier allows you to instantly connect your Moverbase account with 2,000+ apps to automate your work and get the most out of your day. Moverbase has already set up some handy zaps so you can automatically add clients to your email marketing apps, get notifications of new jobs in your team’s slack chat apps, or send personalized emails when new moving leads are received. To get started we will be walking you through connecting your Moverbase account to Zapier.
- To start you’ll need a Zapier account. If you do not already have an account with Zapier you can create one at Zapier.com They offer a free plan which allows you to create up to 5 Zaps and execute 100 tasks each month. Click here for more information on Zapier’s Plans & Pricing
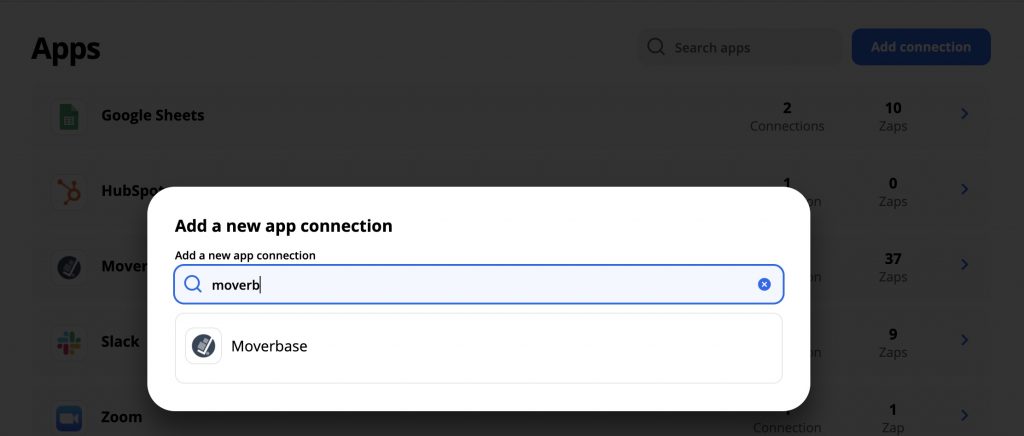
- Now that you have a Zapier account you’re ready to link your Moverbase. Go to My Apps in Zapier’s left side menu and click the blue Add Connection button at the top. Type Moverbase into the search bar and click on the Moverbase icon to connect your account.
- This will open a pop up window, which will ask for your Moverbase API key.
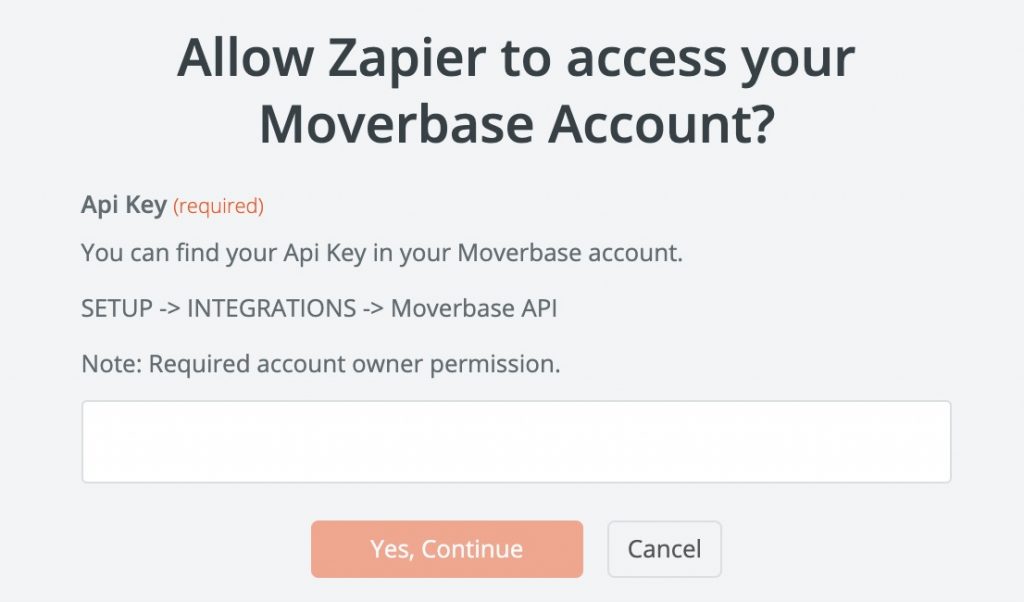
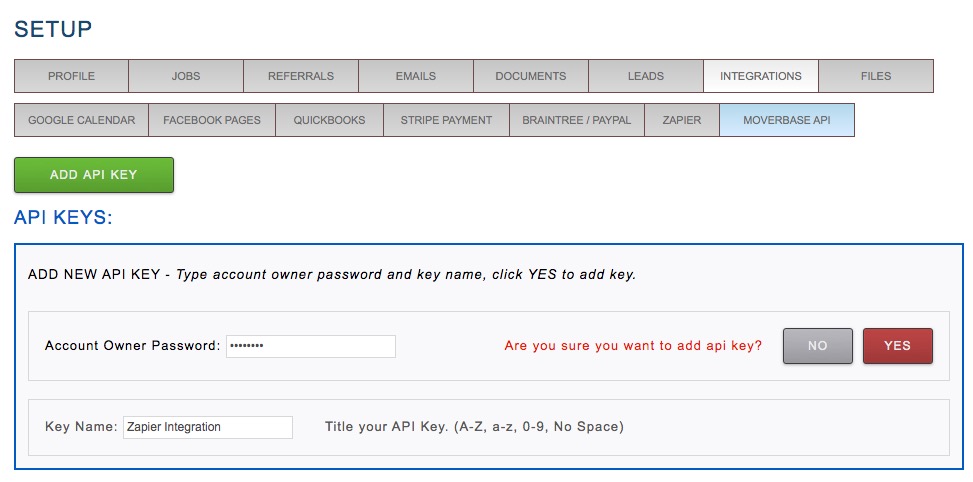
- To create new API key, go to SETUP>INTEGRATIONS>MOVERBASE API. Enter the name of your key so you can identify it and enter your Account Owner Password then click yes to add a new API key. Copy and paste your API key to the Zapier popup and click Yes, Continue. **Note you must be logged in as the Account Owner to create new API Keys**
- Congratulations, your account is now connected and you are ready to begin using Zapier!
If you have any questions about Zapier or any questions in general you can always email us at support@moverbase.com